Ever wondered which moths might be fluttering nearby at night? Make your own moth trap and host a moth garden party! By the way, it’s BYOB (bring your own bulb).
Using light traps to attract moths is a fun and effective way to find out more about moths and see who might be flying in your local area. If you’re looking to get started with moth trapping but don’t have the budget to buy a trap, follow our tutorial for making your own!
On the bucket list
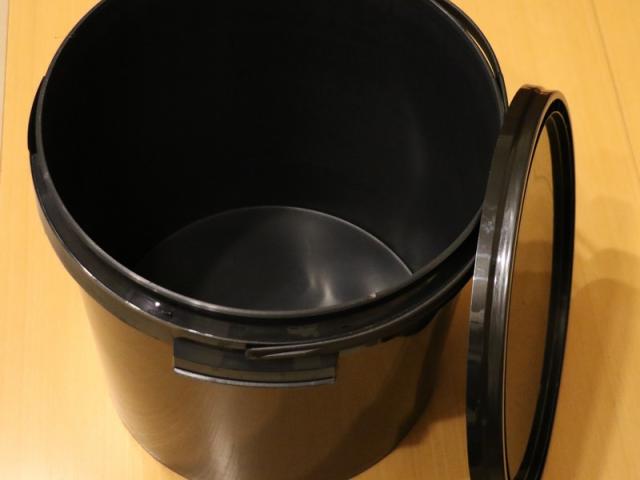
The first step is to find a bucket. You need something sturdy with a good fitting lid. If you’re looking for a more compact trap, opt for a 20 litre bucket. Want something slightly bigger? Try a 35 litre bucket. Shorter buckets with a larger diameter are preferable.
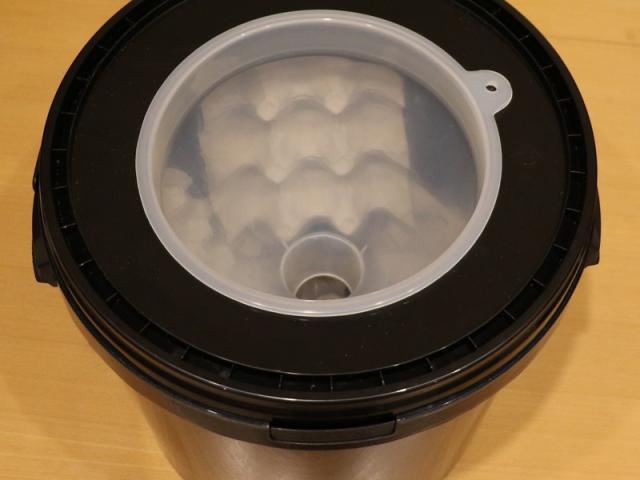
Now you need a large household funnel – for a small trap use a 215mm funnel, for a larger trap use a 255mm funnel. Cut the funnel down by up to 10cm to give a 4cm or 5cm gap to the bottom of the trap. The diameter of the bottom of the funnel can be as little as 3cm and it will still allow large moths in while making it difficult to get back out. It is worth considering painting the bottom part of the funnel matt black to avoid it being lit up and attracting moths to a possible exit from the trap.
The entrance funnel should have a good lip so that there is no risk of the funnel falling through the circular hole in the lid. The diameter of the hole in the lid needs to be measured carefully to be very slightly greater than the outer size at the top of the sloping sides of the funnel. For example, for the 215mm funnel, the hole required is 202mm. You can use a circle compass cutter to make the hole and, if the lid is thin enough, cut it with a Stanley knife. However, take care as this can be difficult to control so using good kitchen scissors or snips may be best. A drawing compass or string around a drawing pin held at the centre of the lid can provide the line to cut around.
You should drill 6mm or 8mm drainage holes around the perimeter of the base of the bucket to allow any rainwater to drain away.
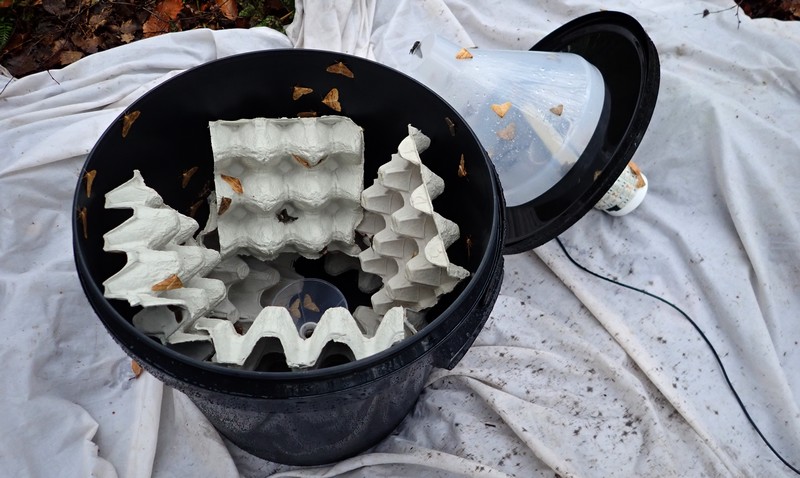
After filling the bucket with egg boxes in a way that keeps clear of the funnels, the lid can be replaced, and the entrance funnel should slot into the lid.
Let there be light
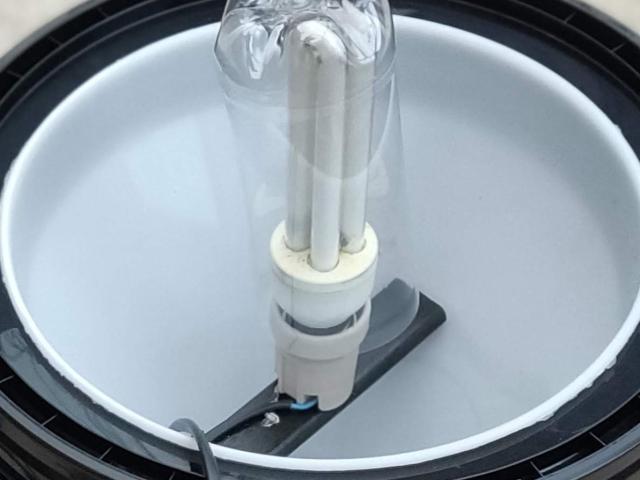
You’re now ready to add a light. Look for a bulb that emits UVB light such as those used in reptile terrariums. A 13-watt bulb should provide enough light even in urban areas if you put the trap in a dark place away from streetlights.
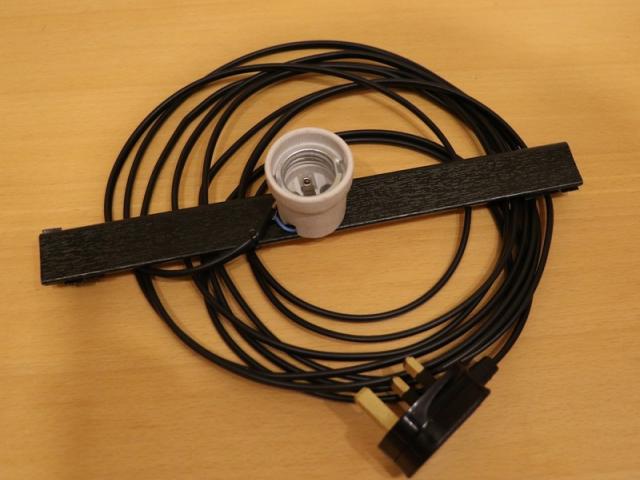
Next, you’ll need to get a wired bulb holder that matches the end of your bulb - most of the compact fluorescent bulbs which are suitable for moth trapping use an ES27 screw fitting, but make sure to check which size you need before selecting your bulb holder. Try to find one that comes with a bracket with mounting holes – this will make it much easier to attach to your trap.
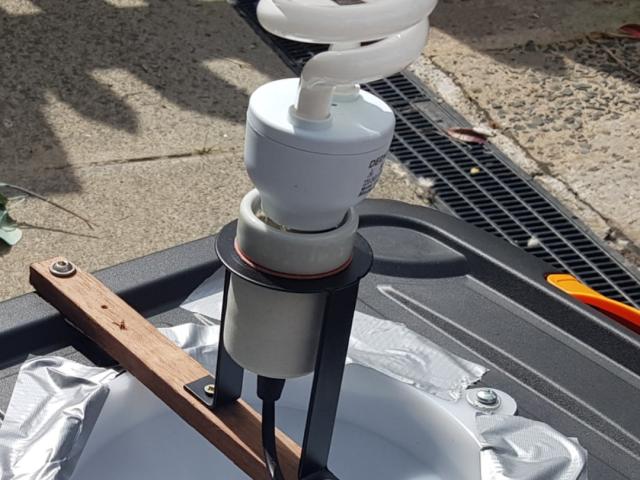
Now you’re ready to mount your bulb! There are many options for fitting the bulb holder to the trap, but we’ve used of a length of 30mm wide uPVC architrave.
If you have selected a bulb holder with a bracket, mark and drill pilot holds in your mounting bar and screw the bracket to the bar. If you don’t have a bracket, drill pilot holes in the bar and use self-tapping screws to attach the bulb holder - we use 13mm x 3.5mm screws. Next, drill a hole in the side of the mounting bar 50mm from the bulb holder and secure your power cable using a cable tie.
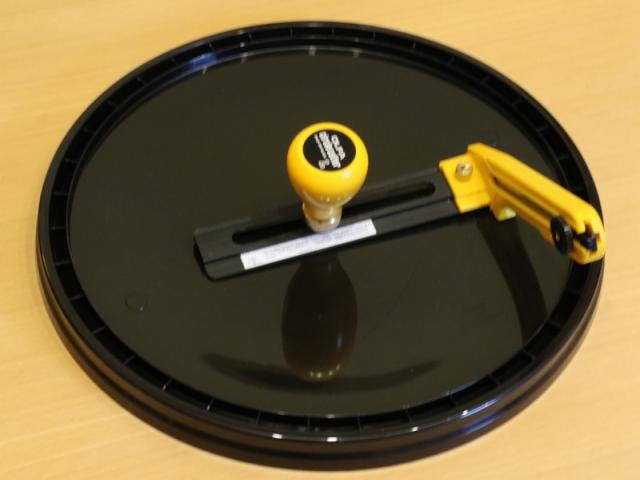
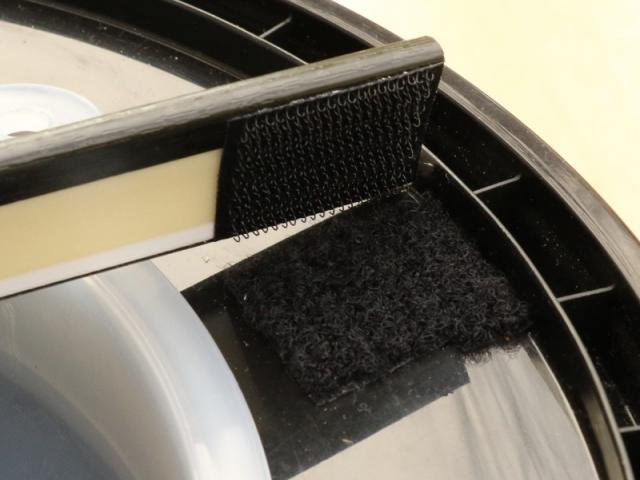
Finally, cut and affix Velcro strips to the bar and the lid of the trap and attach the mounting bar.
Power up
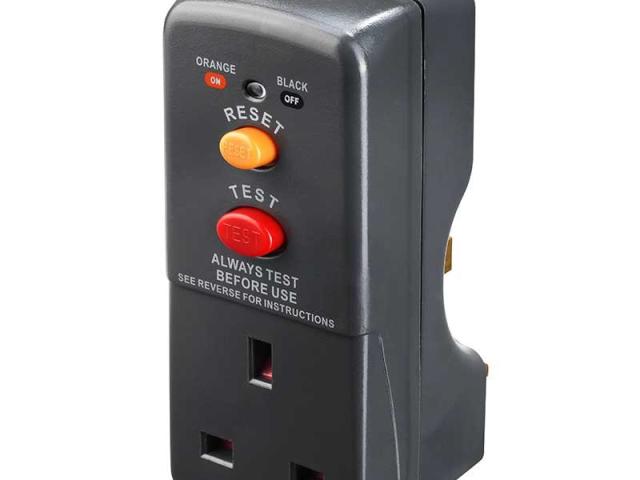
Care should always be exercised when dealing with mains electricity. Use an RCD if your mains fuse box is not already protected.
Screw your bulb into the bulb holder.
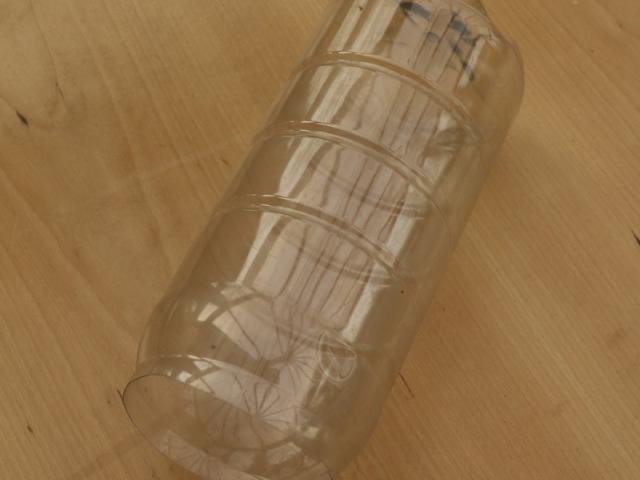
To keep the bulb from getting wet, create a cover using a plastic bottle. Choose any empty plastic drinks bottle which is long enough to fit over the bulb and cut round at the neck carefully with nail scissors.
Pop your cover on your bulb, plug in and you’re ready to see which moths visit!
Following these simple steps should enable you to see which moths are visiting your garden or wild space. To discover the moths you might spot throughout the year, sign up for your FREE Moths by Month calendar today!